
People are aching to get out and start gardening. Have you started already? Do you have questions? For answers, turn to Ask an Expert, an online question-and-answer tool from Oregon State University’s Extension Service. OSU Extension faculty and Master Gardeners reply to queries within two business days, usually less. To ask a question, simply go to the OSU Extension website, type it in and include the county where you live. Here are some questions asked by other gardeners. What’s yours?
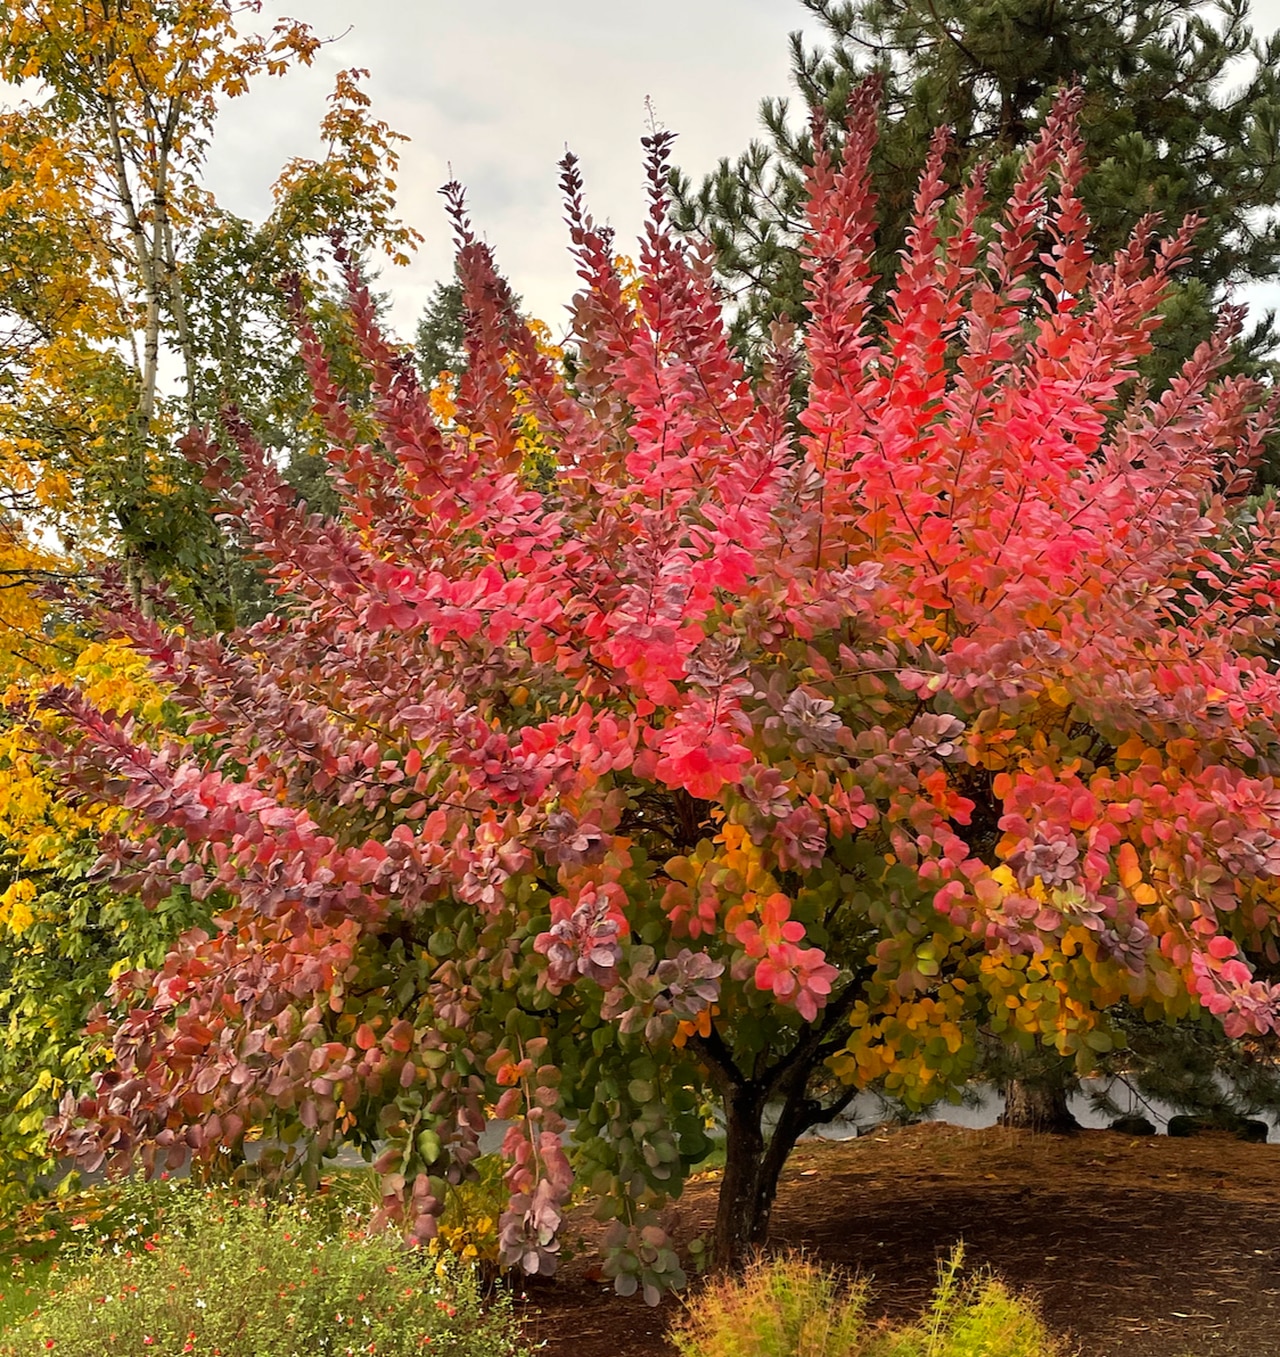
Q: The smoke tree I planted three years ago needs fairly constant pruning because the branches grow rapidly, droop down to within 3-4 feet from the sidewalk, where passersby grab the branches and partially break them off.
I try to follow good pruning practices when cutting off these damaged branches, but the structure of the tree is very unusual and makes it hard to determine how to repair the damage correctly.
I looked online to see if there was advice about this and found info that smoke trees are actually bushes that are trained/pruned to look like a tree but need to be pruned like a bush. Is this true? Suggestions? – Multnomah County
A: A smoke tree (Cotinus) is indeed a shrub and not a tree, though most of the ones you’ll see are trained to look like a tree with two or three branches acting as the “trunk” and the foliage as the canopy.
You don’t have to prune them like this; you can also prune them hard in spring and they will produce an abundance of fresh foliage and look more like a shrub.
However, if you choose this option, you run the risk of missing out on the smoke like flowers that Cotinus produce. The question is really how do you want your Cotinus to look? Oregon State University has not published any documents on how to prune a Cotinus specifically but I found this guide that shows you the two ways to prune your smoke tree (shrub).
– Kris LaMar, OSU Extension Master Gardener
Q: Where can I get my soil sample tested to see how healthy and nutrient rich it is?
A: Below are three resources to guide your soil testing process. The guides will explain what tests you may decide to go for, how to take samples and a list of labs that will tell you what type of testing each one offers. OSU is one of the options. A Guide to Collecting Soil Samples for Farms and Gardens – This publication is a simple guide on “how to take a soil sample.” Remember, the results of the soil test will only be as good as the soil sample taken. Be thorough, collecting a representative sample of the complete area to be tested. Check with the local Extension Service office to see if there is a soil probe available for loan.
A List of Analytical Labs Serving Oregon – This list of labs is updated every few years. Before choosing a lab, call for current prices and procedures for mailing the sample. Labs will often have packages of several analyzes for a lower cost than individual tests.
Soil Test Interpretation Guide – Soil tests results may look a little foreign! This guide will help sort out the key points. For further information about specific soil results, contact the local Extension Service office or a private consultant. – Teagan Moran, OSU Extension horticulturist

Peas in a cover cropOSU Extension Services
Q: I have two raised garden boxes and two mounded berms, without boxes around them. Last September, I sowed winter peas as ground cover to protect the soil over winter. I am planning to plant onions, peppers, carrots, potatoes, tomatoes, celery, herbs, greens and some flowers this spring/summer.
I think the next step with those four garden beds is to mow the winter peas so they die out and become green mulch. After that, can I plant directly and should it be starts or can I sow seeds? Or, would it be better to till everything in and let it sit for a couple weeks before planting? – Lane County
A: There are two options for a winter cover crop. You can mow off the tops and work in the roots (preferable) or you can till all into the soil. In the latter case you must allow at least two weeks before planting as the tops need time to break down. In the first method you can compost all the tops and chop in the roots, releasing the available nitrogen from the peas.
The other option is to just leave the roots to slowly decompose and plant transplants. To plant seeds, you will want to wait at least two weeks again. When you are planting transplants, their root system is already working, and you can be sure that none of the pea roots are directly in their space. – Pat Patterson, OSU Extension Master Gardener

compost binOSU Extension Services
Q: I have a DIY compost bin made from salvaged lumber and mesh wire fencing. I’m looking to add a second composting bin and have a couple questions.
1) Would it make sense to add a different type of bin, such as a conical plastic bin or a tumbler bin?
2) If I do go with something like this to complement the wood/fencing bin I have, would you recommend putting raw fruit and vegetable and garden material in the plastic bin first and then transferring to the wood-and-fencing bin while the compost mature? Or, should I do the opposite – start the raw material in my current bin and then move it to a conical or tumbler composting bin to mature? – Clackamas County
A: You are asking the right person. I have transitioned my DIY composter – similar to yours – to massive leaf storage. I use a lot of leaves in my food waste compost.
Certainly you could just add another bin to your composter.
Here is how I manage food waste: I have a tumbler. I fill it about 2/3 full with straw or leaves or shredded office paper, and begin adding food scraps. This approach is convenient because the tumbler can receive more scraps at any time, without the time investment in turning the compost pile. (BTW, I have never produced good, finished compost in this thing.) The decomposing food in the tumbler gets pretty rank – lots of organic acids produced. Still, this tumbler is up off the ground (turns with a crank) and the resident squirrels, raccoons and opossums can’t get at the food. Plenty of insect eggs get laid and hatch out to larvae and even pupae, but they are taken care of in the next step. When the tumbler is full enough or rank enough, I empty it, add more deciduous leaves from my store, and fill one of those plastic composters that are everywhere. These are easy to turn in about 20 minutes and easy to manage for water and nitrogen.
The reason I gave up the DIY composter for composting food waste was because it took me up to two hours fully turn. I turn the plastic composters as often as every two weeks or so and when it’s done enough, ie I can’t recognize any food scraps any more, I may screen and store or apply to the vegetable garden. I may add some kind of nitrogen source – alfalfa pellets or old N (nitrogen) fertilizer. This causes the compost to heat up and any larvae or pupae from the tumbler are killed and decomposed.
If you can get your composters – any and all of them – inoculated with red wigglers, you can have value-added compost. I sometimes leave good enough compost in the composter for up to two months, allowing earthworms to feed and enrich the compost with their castings. So, it’s really up to you, but if you’re even thinking about it, I think you must be a composting enthusiast. You might give it a try. – Linda Brewer, OSU Extension compost expert